.:: DNS Server ::.
The Domain Name System (DNS) is a hierarchical naming system built on a distributed database for computers, services, or any resource connected to the Internet or a private network. It associates various information with domain names assigned to each of the participating entities. Most importantly, it translates domain names meaningful to humans into the numerical identifiers associated with networking equipment for the purpose of locating and addressing these devices worldwide. An often-used analogy to explain the Domain Name System is that it serves as the phone book for the Internet by translating human-friendly computer hostnames into IP addresses. For example, the domain name www.google.com translates to the addresses 209.85.146.104 (IPV4).
Installing DNS
- Click Start, → Control Panel, and click on Add or Remove Programs. Click Add/Remove Windows Components.

- In Components, select the Networking Services check box, and then click Details.
- In Subcomponents of Networking Services, select the Domain Name System (DNS) check box, click OK, and then click Next.

- If you are prompted, in Copy files from, type the full path of the distribution files, and then click OK.
-----------------------------
Configuring DNS
To configure DNS, the server must have a static IP. Confirm it first and then do the following steps.
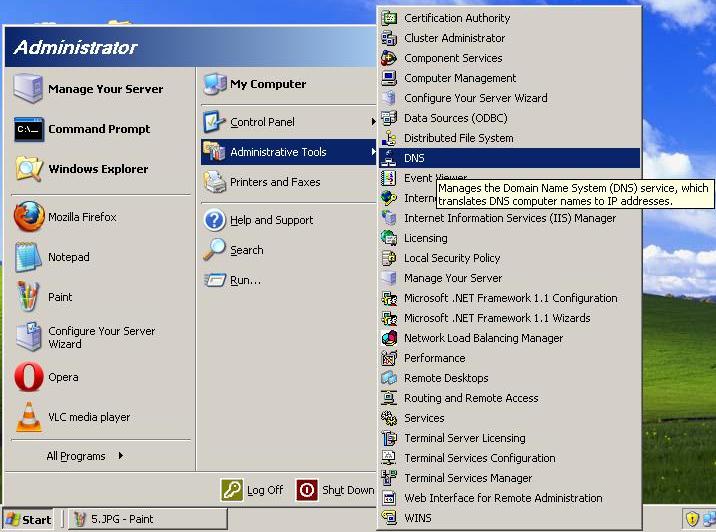
- Click Start, → All Programs, → Administrative Tools, and click on DNS.
- Expand pc-name, Right-click on Forward Lookup Zone and click on New Zone. It will start New Zone Wizard.

- Select the Zone Type and then click Next.
- Give a Zone Name and click Next.

- Create a new zone file or use the existing one in this step. If you want to use the existing one that was copied from another DNS server, then ensure that the file was copied to the folder %SystemRoot%\system32\dns on this server. Then click Next.
- Select the Dynamic update options you want and click Next.
- The New Zone Wizard will complete now. Press Finish to close the window.
- Right-click on the Zone Name just created and click on Properties.

- Click-on Name Servers menu. Give a Server Fully Qualified Domain Name (FQDN) and add the IPs required by clicking on Add.

- Click on Apply and then OK. Then Click on Refresh.

- The DNS Server is now ready. To use this follow the steps described on Configuring your client PCs given below.
Alternat way to Configuring DNS
- Click Start, → All Programs, → Administrative Tools, and click on Configure Your Server Wizard.
- On the Server Role page, click DNS server, and then click Next.
- On the Summary of Selections page, view and confirm the options that you have selected. The following items should appear on this page:
- Install DNS
- Run the Configure a DNS Wizard to configure DNS
If the Summary of Selections page lists these two items, click Next. If the Summary of Selections page does not list these two items, click Back to return to the Server Role page, click DNS, and then click Next.
- When the Configure Your Server Wizard installs the DNS service, it first determines whether the IP address for this server is static or is configured automatically. If your server is currently configured to obtain its IP address automatically, the Configuring Components page of the Windows Components Wizard prompts you to configure this server with a static IP address. To do so:
- In the Local Area Connection Properties dialog box, click Internet Protocol (TCP/IP), and then click Properties.
- In the Internet Protocols (TCP/IP) Properties dialog box, click Use the following IP address, and then type the static IP address, subnet mask, and default gateway for this server.
- In Preferred DNS, type the IP address of this server.
- In Alternate DNS, type the IP address of another internal DNS server, or leave this box blank.
- When you finish setting up the static addresses for your DNS, click OK, and then click Close.
- After you click Close, the Configure a DNS Server Wizard starts. In the wizard, follow these steps:
- On the Select Configuration Action page, select the Create a forward lookup zone check box, and then click Next.
- To specify that this DNS hosts a DNS zone that contains DNS resource records for your network resources, on the Primary Server Location page, click This server maintains the zone, and then click Next.
- On the Zone Name page, in Zone name, specify the name of the DNS zone for your network, and then click Next. The name of the zone is the same as the name of the DNS domain for your small organization or branch office.
- On the Dynamic Update page, click Allow both non-secure and secure dynamic updates, and then click Next. This makes sure that the DNS resource records for the resources in your network update automatically.
- On the Forwarders page, click Yes, it should forward queries to DNS servers with the following IP addresses, and then click Next. When you select this configuration, you forward all DNS queries for DNS names outside your network to a DNS at either your ISP or central office. Type one or more IP addresses that either your ISP or central office DNS servers use.
- On the Completing the Configure a DNS Wizard page of the Configure a DNS Wizard, you can click Back to change any of the settings. To apply your selections, click Finish.
After you finish the Configure a DNS Wizard, the Configure Your Server Wizard displays the This Server is Now a DNS Server page. To review all the changes that you made to your server in the Configure Your Server Wizard or to make sure that a new role was installed successfully, click Configure Your Server log. The Configure Your Server Wizard log is located at %systemroot%\Debug\Configure Your Server.log. To close the Configure Your Server Wizard, click Finish.
-----------------------------
Adding a new Host
Now that the DNS Server is operational, you need to add a Host name. If you have set up IIS to use Host Headers you need to create an entry for your Intranet. If you have not given any value for Host Header, you do not need to add host.
To add the new Host do the following:
To add the new Host do the following:
- Right-click in the white space in the pane on the right and select New Host (A) from the menu that appears.
- If your website is hosted externally, you need to add another Host called www which will point at the IP of the web server on which it is hosted. You also need to do the same for your email by adding a mail host.
- Type the subdomain name into the upper box and the IP address it should forward to in the lower box. Then press the Add Host button. A message will then appear indicating if the new host was successfully added after which you can either add more hosts or press Done to close the New Host screen.
-----------------------------
Configuring your client PCs (Windows XP)
To configure your client PCs to use the new DNS Server you will need to make a change to their network settings.
To do this, do the following:
- Right-click on My Network Places and select Properties. Then, right-click on Local Area Connection and select Properties. Select Internet Protocol (TCP/IP) from the list and click Properties.
- Ensure that the Use the following DNS server addresses radio button is selected and enter the IP address of your new DNS Server into the Preferred DNS Server box and press OK. The client PC will now use your new DNS Server.
Alternatively, where you have access to a DHCP server, you can configure it to issue the IP address of the new DNS server to all your client PCs automatically. This is the preferred method of assigning a DNS server.
-----------------------------
If you are prompted to insert the Windows Server 2003 CD-ROM into the computer's CD-ROM or DVD-ROM drive do so. Setup copies the DNS server and tool files to your computer.
(**This CD must be the same type of edition and service pack, otherwise it may not work)

Help Links
N.B. :
**This tutorial is created using Microsoft Windows Server 2003 Service Pack 1
awesome Article, Thanks for sharing!
ReplyDeleteTop 5 Best DNS Servers You Must Know About
sewing thread box
ReplyDelete